The Viral 100ml Water Test: How Indian Motovloggers Test Ethanol in Petrol at Home (DIY Guide)
Seen Indian riders on Instagram Reels testing petrol with a glass cylinder and water? Here is the exact chemistry, step-by-step procedure, and formula to test your local pump petrol at home.
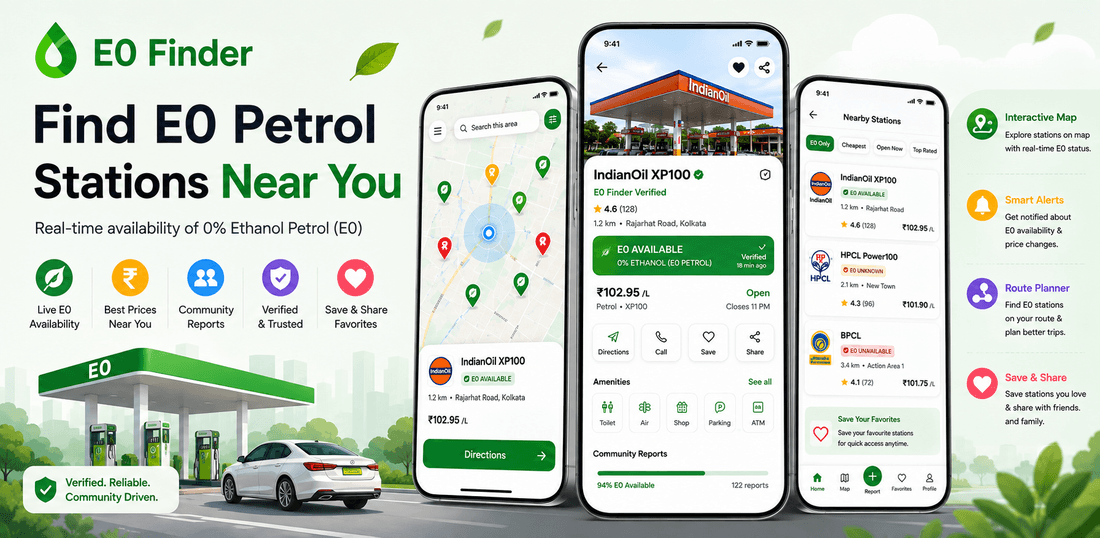
Key Takeaways for Indian Motorists:
- The 100ml water extraction test utilizes ethanol's polar hydrophilic bonding to measure exact blend percentages.
- Equipment needed: A 100ml borosilicate glass cylinder (₹150 on Amazon India) and 10ml distilled water.
- If 10ml water expands to 28ml after shaking with 90ml petrol, the fuel contains ~20% Ethanol (E20).
- Upload your test results directly to E0 Finder to verify pumps for 10,000+ Indian riders.
Table of Contents
Why the 100ml Water Test Took Over Indian Biker Social Media
Over the past few months, Instagram Reels and YouTube Shorts across Indian automotive channels have been dominated by riders testing fuel with glass cylinders.
From motovloggers in Bengaluru and Delhi to vintage Royal Enfield mechanics in Pune and Chennai, riders are taking fuel testing into their own hands.
The science behind this test is rock solid: Water Extraction Chromatography.
The Science: Why Water Pulls Ethanol Out of Petrol
- Hydrocarbon Gasoline (Non-Polar & Hydrophobic): Petrol will not mix with water.
- Ethanol (Polar & Hydrophilic): Alcohol molecules contain a hydroxyl (-OH) group that forms instant hydrogen bonds with water molecules.
- The Extraction: When you shake water and blended petrol together, the ethanol abandons the gasoline and dissolves into the water layer, causing the water volume at the bottom to physically expand.
What You Need for the Test (Under ₹200 on Amazon India)
- 100ml Borosilicate Graduated Glass Cylinder (with 1ml graduation lines).
- 10ml of Room-Temperature Water (distilled or clean drinking water).
- 90ml of Petrol Sample from your bike's tank or local fuel bunk.
- Food Colouring (Optional): 1 drop of green or blue food dye makes the water boundary ultra-sharp on camera.
4-Step Testing Procedure
- Step 1: Pour exactly 10ml of water into the cylinder.
- Step 2: Pour your petrol sample until the total liquid level hits the 100ml line (so you have 90ml petrol + 10ml water).
- Step 3: Place your thumb (wearing a nitrile glove) or rubber stopper tightly over the top and shake vigorously for 15 seconds.
- Step 4: Place the cylinder on a flat surface and let it rest for 3 minutes until the liquids completely settle into two sharp layers.
How to Read Your Results
Look at the line where the bottom water layer meets the top petrol layer:
- Bottom layer stays at exactly 10ml: [CONFIRMED] 100% Pure E0 Petrol (Zero ethanol extracted).
- Bottom layer reaches ~19–20ml: E10 Blend (~10% Ethanol).
- Bottom layer reaches ~28–30ml: [WARNING] E20 Blend (~20% Ethanol).
- Bottom layer exceeds 32ml: [CRITICAL] Over-blended or Contaminated Fuel (Immediate fuel system risk!).
The Exact Mathematical Formula:
Help Your Local Biker Community on E0 Finder
Don't just keep your test results to yourself!
Whenever you test a petrol bunk in your city:
- Snap a quick photo of your cylinder.
- Open the E0 Finder Android App.
- Select the bunk on the map, tap "Submit Report", and upload your photo.
- Your submission helps thousands of motorcyclists and classic car owners avoid bad fuel!
Calculate Your Fuel & Maintenance Savings
See how much fuel and preventive repair costs your bike or car saves on pure E0 petrol.
Visual Evidence & E0 Finder In-App Verification
Find 0% Ethanol Petrol Near You Instantly
Download E0 Finder for Android. Real-time verified pumps, live density logs (Form-8), turn-by-turn navigation, and crowd-verified reports across 500+ Indian cities.